
Tuesday, May 29, 2012

Vintage-Looking Painted Sign
You will need:
piece of salvaged wood
upholstery tacks or short nails (optional)
hammer
acrylic paint (background color)
black acrylic paint (or other color to fill in letters)
large paint brush
small paint brush
laser printer
twine
Sharpie Marker or other dull, rounded tool
This project started with a pile of cedar fence pieces that we've had sitting in our backyard for ages. My husband had just loaded a good portion of them into our chiminea to be burned when I got the idea for these signs and was able to save them from becoming ash.

I loved how grey and weathered they had become from sitting outside. Start by lightly sanding your piece of wood if it's too rough, or just wiping it off to remove any dirt or other loose particles.
Next, distress the wood to your liking. I hammered a few upholstery tacks into the corners, added a couple of empty nail holes then banged on it with the claw of my hammer. In the photo below the top piece is untouched and the bottom one has been beaten. Poor thing.


Next, choose your paint. Most home improvement stores sell miss-tinted paints for very cheap, so during one of my visits to the Home Depot I picked up this little sample pot of pretty blueish gray paint for .50. Sweet! After experimenting with different paints while makig these signs, I've found that the less sheen the paint has, the better. Cheap acrylic craft paint works best, flat latex paint like the kind I used here is next best. DON'T bother with spray paint- your letters won't transfer well at all.
(I wasn't really sure if I was going to be doing a tutorial for this or not until I was finished, so I'm afraid I'm missing a few photos for some of the steps. Don't worry. It will make sense anyway.)
After you've properly dented and nicked your piece of wood to perfection and added your tacks or nails, take your large , dry paint brush and get a little paint on it. Wipe off any excess on the lip of your paint can and sweep your paint lightly over the wood. You're not going for a perfect paint job here. In fact, you want it to be as imperfect as possible without it looking like you were trying to make it imperfect, if that makes any sense. And don't bother painting the sides, just the front.
Once you're happy with the paint, put the wood aside to dry and head to your computer. Choose a word and a font that you want on your sign and enlarge it to a size that will fit on the piece of wood that you have. Flip it so it's backwards and print.
I used Adobe Photoshop to print my backwards words using the "Rotate Canvas" feature under Image, then clicking on "Flip Horizontal". If you're using another software program like Microsoft Word, it might be a little trickier. Check the already submitted comments to see if you can find something that works, or check out this link that I found that explains how to either flip the text using your printer's functions, or in Word itself. It seems like kind of an involved process, but I tried it with my older version of Word and it worked.
Go back to your wood and rinse the paintbrush you just used, but don't worry about getting the brush dry.
Turn your piece of paper over so that the ink is face down on your wood, position it so that it's centered (I like to crease the bottom of my paper along the edge of the wood so it doesn't move around) and begin brushing the paper with your wet paintbrush.
You don't want to make your paper sopping wet or the ink will just run and the paper will disintegrate. Just wet it enough so that it seeps through to the other side and starts to release the ink from the paper.

Take your Sharpie lid and begin to burnish your letters going horizontally and vertically. You want to transfer as much of the ink from the paper to the wood as you can. Don't peek, though. You don't want to accidentally shift your paper. Just scribble over each letter being sure you've burnished over every bit of each one.

Here's what it should look like when you're done. You could leave it like this if you want it to be really faded looking, or...

... you can go back with your small paint brush and fill in the letters a little with some very, very diluted black paint.

Once you've finished with the word, distress the sign a little more with some sandpaper, taking off some of the paint along the edges and swiping it over the word a bit to make it look more aged and authentic.
Finally, nail or staple twine to the back of your wood to act as a hanger for your new, old-looking sign.
I used some of my favorite foods for the signs I made for my kitchen and I just adore them. The "cocoa" sign was the very first one I did, and as you can see I was more deliberate when filling in the letters with paint than I was with the others. I like the faded look of the other ones more, so I'll go back and sand it a little so that it matches them better.


piece of salvaged wood
upholstery tacks or short nails (optional)
hammer
acrylic paint (background color)
black acrylic paint (or other color to fill in letters)
large paint brush
small paint brush
laser printer
twine
Sharpie Marker or other dull, rounded tool
This project started with a pile of cedar fence pieces that we've had sitting in our backyard for ages. My husband had just loaded a good portion of them into our chiminea to be burned when I got the idea for these signs and was able to save them from becoming ash.

I loved how grey and weathered they had become from sitting outside. Start by lightly sanding your piece of wood if it's too rough, or just wiping it off to remove any dirt or other loose particles.
Next, distress the wood to your liking. I hammered a few upholstery tacks into the corners, added a couple of empty nail holes then banged on it with the claw of my hammer. In the photo below the top piece is untouched and the bottom one has been beaten. Poor thing.


Next, choose your paint. Most home improvement stores sell miss-tinted paints for very cheap, so during one of my visits to the Home Depot I picked up this little sample pot of pretty blueish gray paint for .50. Sweet! After experimenting with different paints while makig these signs, I've found that the less sheen the paint has, the better. Cheap acrylic craft paint works best, flat latex paint like the kind I used here is next best. DON'T bother with spray paint- your letters won't transfer well at all.

(I wasn't really sure if I was going to be doing a tutorial for this or not until I was finished, so I'm afraid I'm missing a few photos for some of the steps. Don't worry. It will make sense anyway.)
After you've properly dented and nicked your piece of wood to perfection and added your tacks or nails, take your large , dry paint brush and get a little paint on it. Wipe off any excess on the lip of your paint can and sweep your paint lightly over the wood. You're not going for a perfect paint job here. In fact, you want it to be as imperfect as possible without it looking like you were trying to make it imperfect, if that makes any sense. And don't bother painting the sides, just the front.
Once you're happy with the paint, put the wood aside to dry and head to your computer. Choose a word and a font that you want on your sign and enlarge it to a size that will fit on the piece of wood that you have. Flip it so it's backwards and print.
I used Adobe Photoshop to print my backwards words using the "Rotate Canvas" feature under Image, then clicking on "Flip Horizontal". If you're using another software program like Microsoft Word, it might be a little trickier. Check the already submitted comments to see if you can find something that works, or check out this link that I found that explains how to either flip the text using your printer's functions, or in Word itself. It seems like kind of an involved process, but I tried it with my older version of Word and it worked.
Go back to your wood and rinse the paintbrush you just used, but don't worry about getting the brush dry.
Turn your piece of paper over so that the ink is face down on your wood, position it so that it's centered (I like to crease the bottom of my paper along the edge of the wood so it doesn't move around) and begin brushing the paper with your wet paintbrush.
You don't want to make your paper sopping wet or the ink will just run and the paper will disintegrate. Just wet it enough so that it seeps through to the other side and starts to release the ink from the paper.

Take your Sharpie lid and begin to burnish your letters going horizontally and vertically. You want to transfer as much of the ink from the paper to the wood as you can. Don't peek, though. You don't want to accidentally shift your paper. Just scribble over each letter being sure you've burnished over every bit of each one.

Here's what it should look like when you're done. You could leave it like this if you want it to be really faded looking, or...

... you can go back with your small paint brush and fill in the letters a little with some very, very diluted black paint.

Once you've finished with the word, distress the sign a little more with some sandpaper, taking off some of the paint along the edges and swiping it over the word a bit to make it look more aged and authentic.
Finally, nail or staple twine to the back of your wood to act as a hanger for your new, old-looking sign.
I used some of my favorite foods for the signs I made for my kitchen and I just adore them. The "cocoa" sign was the very first one I did, and as you can see I was more deliberate when filling in the letters with paint than I was with the others. I like the faded look of the other ones more, so I'll go back and sand it a little so that it matches them better.


Cinnamon Sugar Muffins


Cookie Cups
- Prep:
- 10 mins
- Cooking:
- 20 mins
- Level:
- Easy
- Yields:
- 12 cookie cups

Get creative with Make It Your Way Cookie Cups! Using our
refrigerated chocolate chip bar dough as a base for this customizable
cookie cup, this is one treat that has something for everyone. Perfect
for an after school snack, or after dinner dessert, these cookie cups
can be customized to your personal tastes and filled with a variety of
toppings - yogurt and fruit, ice cream, chocolate, nuts and more!
Ingredients
- 1 package (16.5 ounces) NESTLÉ® TOLL HOUSE® Refrigerated Chocolate Chip Cookie Bar Dough
Directions
PREHEAT oven to 325° F. Grease twelve 2 1/2-inch muffin cups.PRESS two squares of dough together. Place in prepared muffin cups.
BAKE for 20 to 24 minutes or until golden brown. Cool completely in pan on wire rack*. Center of cups will indent slightly upon cooling. With tip of butter knife, remove cookie cups from muffin pan.
FILL cookie cups as desired.
Yogurt & Fruit Cookie Cups: Top each with a spoonful of yogurt and cut-up fresh fruit of choice.
Ice Cream Cookie Cups: Top each with a small scoop of DREYER’S or EDY’S® SLOW CHURNED® Light Ice Cream (any flavor). Sprinkle with NESTLÉ® TOLL HOUSE® Semi-Sweet or Premier White Mini Morsel Toppers.
* Rocky Road Cookie Cups: Immediately after cookie cups come out of the oven, top with a mixture of NESTLÉ® TOLL HOUSE® Semi-Sweet Chocolate Morsels, mini marshmallows and chopped nuts.

Ultimate Menu Board

HOW TO MAKE THE ULTIMATE MENU BOARD
You will need-
11x14 picture frame
2 sheets of decorative 12 x 12 scrapbook paper
2-3 additional coordinating decorative papers
several sheets of solid colored card stock (for meal cards and pockets)
7 clothespins
the boxes from two 16 ct crayon packs
Elmers glue
Hot glue gun and glue
letter stickers (for title)
Meal cards---
Preparatory to using your board, gather several meal ideas (I have about 35) and their recipes. Make a 2 column word document- typing your menu on one side of the page and the ingredients in the column next to it. You should have room to print about 5 menus/ingredients per piece of printer paper. After printing, cut the meals/ingredients out into strips and fold each strip in half, giving you a front and back. Laminate the cards. I used self-laminating paper which worked okay but not perfectly. (Because I didn’t leave much empty space around each card, some of my cards did not seal well all the way around. If I did it again, I would have them done professionally or with the use of a heated laminator.) My cards measure 1 ½ inches tall and then half of the width of an average size paper (4.25 inches) across.
Frame Background
Trim the decorative scrapbook paper to fill your frame. You will use one full sheet and just need a couple of inches of a second piece of paper in order to fill the entire frame. Where the two sheets overlap, place a thin piece of coordinating paper across the width to hide the seams. Put the title above that line using scrapbooking letter stickers. Place in the frame. Secure the background into the frame. Everything else will be done on top of the glass.
Clothespins
Trim strips of paper to fit on top of your clothespins. Using a mixture of 1 part elmers glue to one part water (homemade mod podge,) brush the glue onto the clothespin, place the paper on top and add more of the glue mixture. I think I did about 3 layers of the glue. When the clothespins are dry, you may add the days of the week to each pin if you choose. I punched out little circles and just used the letters m, t, w, etc to designate the day of the week. Space your clothespins evenly along the left hand border of your frame and hot glue them into place.
Pockets-
I used 16 count crayon boxes as the base for my pockets. Turning the box horizontally, cut out one long side- this will be the opening of your pocket. Lay the box out flat onto a piece of card stock and trace it. Cut the card stock out and glue it on top of the crayon box—making folds to match the boxes folds as you go. Reassemble the box, gluing or taping together the open sides. I left just about a half inch extra along the long sides so I could wrap my paper over the top edges of the box for a smoother look. After assembling your boxes, cut a strip of coordinating paper to use as an accent and glue around the pocket. Hot glue the pockets directly onto the glass of your frame.


Cake Batter Cookies

CAKE BATTER PUDDING COOKIES
1 1/2 sticks (or 3/4 cup) butter
3/4 cup brown sugar
1/4 cup sugar
1 (3.4 oz) package instant vanilla pudding mix, dry
3/4 cup yellow cake mix, dry
2 eggs
1 tsp vanilla
1 tsp baking soda
2-1/4 cups flour”
1/2 tsp salt
sprinkles
Preheat oven to 350 F.
Stir together flour, salt and baking soda and set aside.
In a large bowl, cream butter and sugars together.
Add in pudding package and cake mix and beat until well blended.
Add eggs and vanilla and mix until smooth.
Add flour mixture slowly until well incorporated.
Mix in sprinkles sprinkles.
Roll into 1″ balls and place on greased baking sheet.
Bake at 350 F for 10-12 minutes.
Enjoy!
*Note: It is just the powdered pudding mix
inside the packet you use. Just open it up and pour it in. It is in a
box like this:
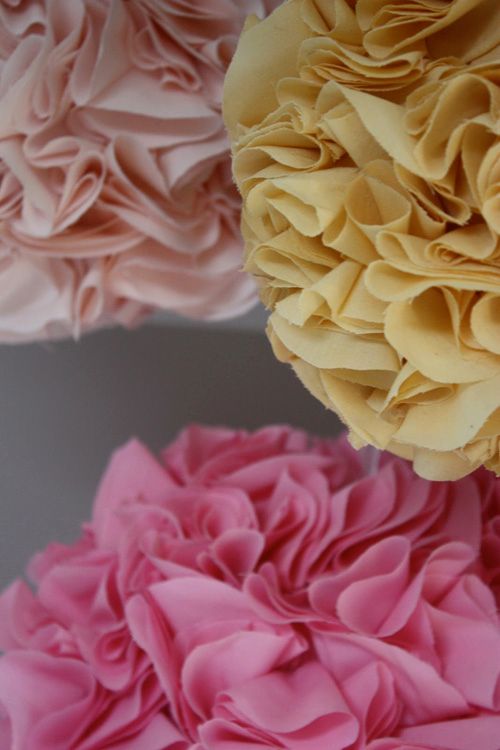
Pom Poms
Materials needed:
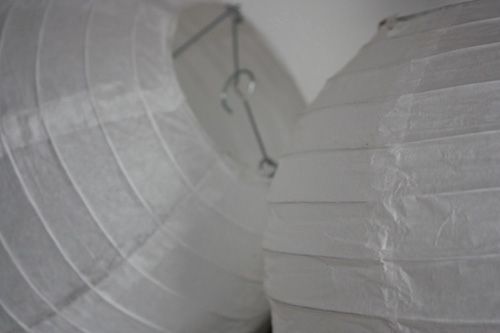
- paper lanterns (I used one 9" and two 6" lanterns)
- 2-3 yards of fabric per lantern (I used 3yd for 9" and 2yd for 6")
- glue gun
- ribbon
- a long weekend
Before
I started, I printed out 3" and 4" circles and traced them onto
cardboard to cut out and use as my tracing template. Once I had my
fabric picked out I used my template to trace the circles along the
whole piece of fabric. I was sure to put them as close together as I
could so I didn't waste any fabric.
With
the 4" circles I was able to get 100 circles per yard and used a full 3
yards. Obviously you get more circles with the 3" template (but I
forgot to count), and also use just under 2 yards. This is where you
don't want to spend a ton of money on expensive fabric. You want
something light that won't be stiff when you glue or heavy when hung. I
used a basic thin cotton material that cost $3-7 per yard depending what
you chose. I lucked out that there was a sale going on at JoAnn Fabrics
along with a 25% off coupon I had, so I purchased my fabric for pretty
cheap.

Once
traced, I cut out all the circles. This is probably the most
time-consuming and somewhat boring part of the project. It's good to
just plop on the couch and stick in a movie while you do this. I watched
a Jersey Shore marathon while I traced and cut. (T-Shirt time!)
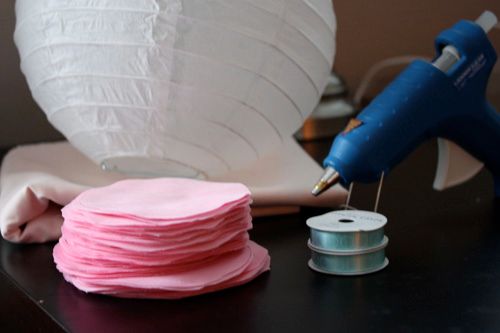
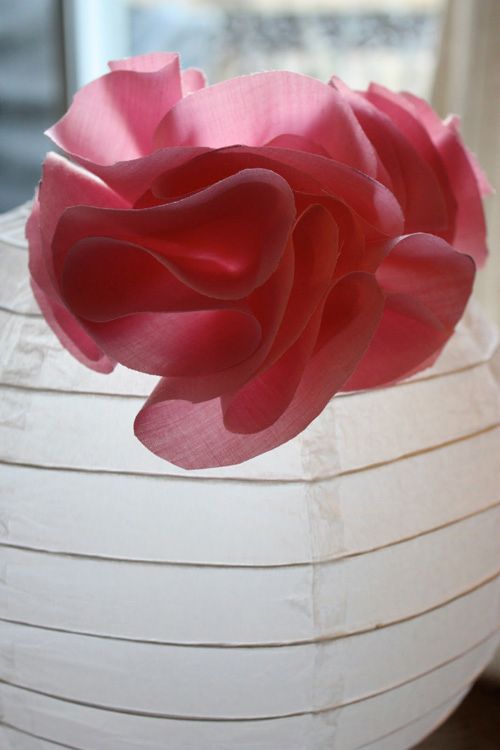
Once your circles are all cut you can begin to glue to your paper lantern. First
fold the circle in half, and stick a dab of glue in the middle. Fold it
in half once more to seal. Put another dab of glue at the bottom of the
folded circle and attach to your lantern.
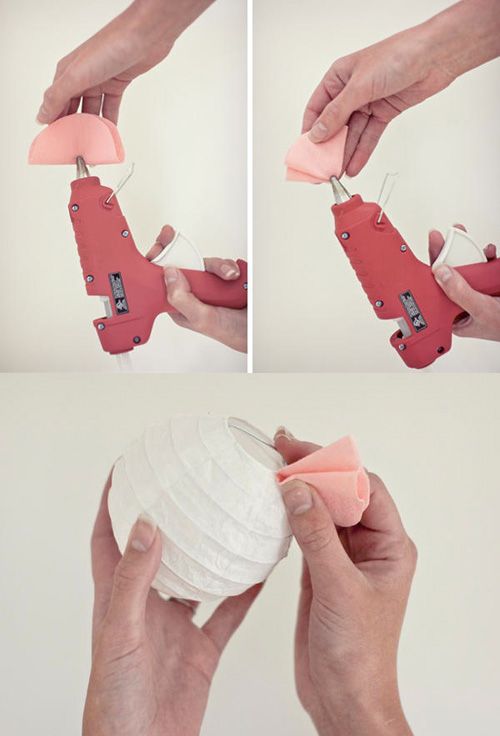
(these 3 pictures snagged from OnceWed since I had no free hands to photograph this step!)
You want to make sure you mix and match directions that you place the circles.
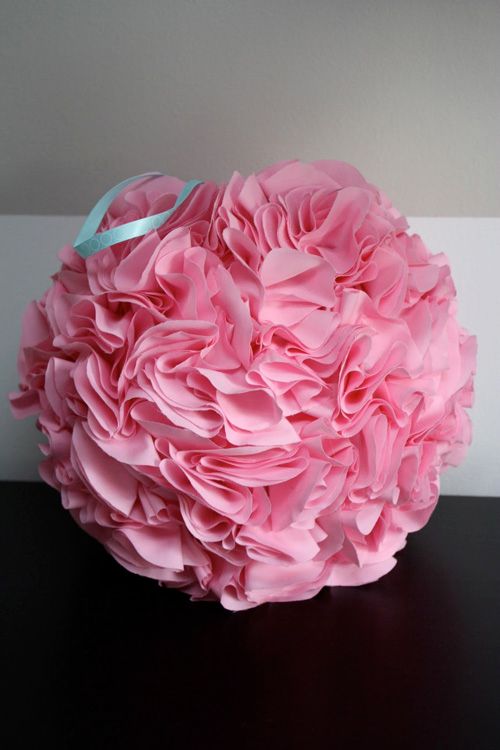
Continue this for a loooong time until your paper lantern is covered.
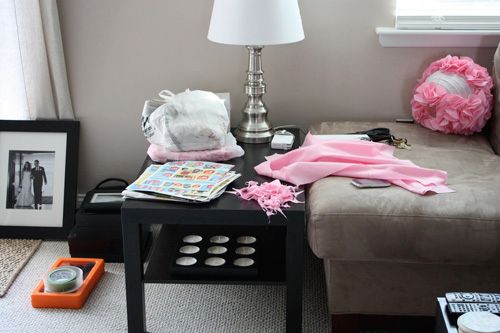
(my work area mid-construction)
Once finished, it will look like this:
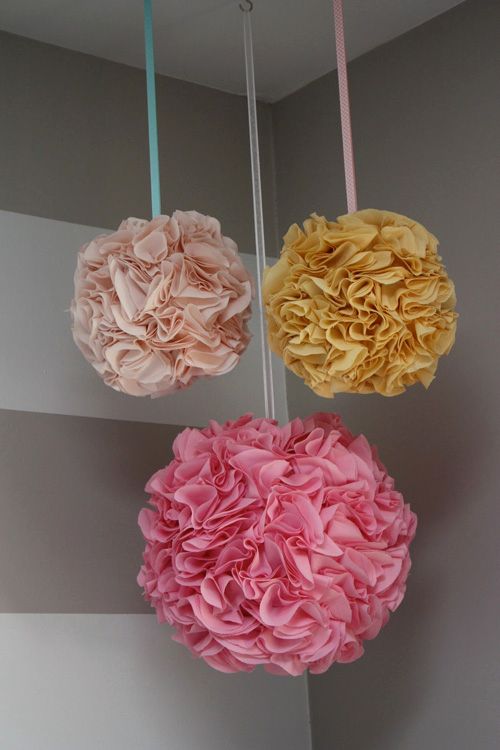
All
you have left to do is attach a long piece of ribbon to the hook inside
the top of the paper lantern and hang where you want. We picked up an
inexpensive pack of mini hooks from Target that simply screwed into the
ceiling. It took the two of us to tackle this step so that I could eye
the spacing of the pom poms and Jordan could screw them into the
ceiling.

Here
is a close up on the ribbons I chose. They were each $1.00 for a mini
spool at JoAnn fabrics. It took about 1 full spool per pom-pom (then
trimmed for length). I chose teal, white and pink ribbons each with its
own unique decorative detail to mix and match with the multi-colored pom
poms.
Once hung, just sit back and enjoy your pretty, whimsical decor!


Cake Batter Rice Krispies Treats

Cake Batter Rice Krispies Recipe
(From How Sweet Eats)
Ingredients:
- 3 Tbsp. butter
- 1 (10 oz.) bag of mini-marshmallows
- 1/4 cup yellow cake mix (the dry cake mix, not prepared into a batter!)
- 6 cups crispy rice cereal
- 1 (1.75 oz.) container of sprinkles
Melt butter in a large saucepan over low heat and add marshmallows. Stir until they begin to melt, adding in (dry) cake mix one spoonful at a time so its combined. Stir in cereal so it is completely coated with marshmallow mixture. Sprinkle in half of the sprinkles and mix. Press into a baking dish (any size will do) and top with remaining sprinkles. Let sit for about 30 minutes before cutting. I find spraying a knife with nonstick spray helps to cut them.
Ali’s Tip:
I actually increased the cake batter to 1/3 cup for my recipe to give it a little extra cake batter kick (the 1/4 cup seemed just a little too subtle to me), but add as much in as you like!
***Note: Many readers have asked what to do with the remaining cake mix. If you would like to use it to whip up a batch of cake mix cookies, just measure out 6 oz. of the remaining cake mix, and combine it with 1/4 cup vegetable or canola oil, and 1 egg. Stir until mixed. Then form into cookie dough balls, and bake in a 350 degree oven for 10-12 minutes.***


Painted Letters on Wood
1. Print out letters (font shown here is American Typewriter) and line up on piece.
Using a ballpoint pen trace outline of letters:

The pressure of the pen creates a slight indent in the wood.
2. Paint inside the indent:

The indent actually creates a tiny dam to hold the paint.


100 Ways to Make Your Marriage Rock
- Write him letters
- Go on regular date nights
- Write his name on lipstick on the bathroom mirror
- Revitalize the romance with intimate dates
- Pray together
- Hide notes in secret places
- Go to bed at the same time
- Listen to music together-share earbuds
- Send him on a scavenger hunt in the house
- Buy him gifts he will love
- Hide a treat in his glovebox or desk at work
- Read the Bible together
- Wear shirts that tell the world you love your spouse
- Praise your spouse to other people
- Let them overhear you
- Read a marriage devotional
- Porn-proof your home
- Be best friends
- Sleep in his t-shirts
- Look to him to make the big decisions (see comment section for my opinion on #20, #21)
- Let her make the small ones
- Don’t nag him
- Put down the seat, pick up your socks for her
- Renew your vows privately with whispers and memories
- Renew them publicly with cake and bubbly
- Fight naked
- Tell him you like him
- Receive his compliments
- Pick your battles
- Show her you love her and tell him you respect him
- Go away together at least once a year
- Frame your wedding vows
- Her: Read For Women Only
- Hang pictures of the two of you around your house
- Kiss in front of your kids
- Make his favorite dessert
- Have pictures of just the two of you made
- Make sex a priority
- Spend time apart occasionally
- Learn to enjoy something he loves
- Surprise each other
- Meet him at the door
- Dreamstorm
- Text each other from across the room
- Be accountable to each other
- Set reminders on your phone to remember him/her throughout the week
- Call him right now and tell him you appreciate him
- Be affectionate
- Him: Read For Men Only
- Leave work and come home early
- Wash, vacuum her car. Keep it full of gas.
- Give each other romantic coupons
- Engage every day in meaningful conversation
- Compliment each other
- Touch your spouse several times throughout the day
- Take one day a month to make your spouse your total focus
- Let each other sleep in
- Be spontaneous!
- Argue fair: avoid these words “you always” and “you never”
- Kiss every day
- Find tangible ways to serve your mate without complaining
- Forgive quickly
- Be honest.
- But not hurtful
- Get on the same page: plan your budget together
- Look your best as often as you can
- Guard your marriage
- Get out of debt (and stay out)
- Laugh together
- Have a date night in
- When your together-BE TOGETHER (take a break from phones, technology, etc)
- Talk about your favorite memories together
- Tell him he’s sexy just because
- Tell her she’s pretty, especially when she’s not feeling it
- Make him breakfast in bed
- Do her chores for her
- Get a couple’s massage or host your own privately
- Read a book out loud together
- Dance together-soft music (alone) or rocking music with the kids
- Bring her/him a favorite drink during the middle of the day
- Exercise together-hikes, bike riding, etc
- Choose not to be annoyed by an irritating behavior/disappointment
- Tell him a secret he doesn’t know about you
- Thank your spouse just because, often
- Sit on the same side of a booth at a restaurant
- Lay in bed together and stare into each other eyes, without talking
- Learn something new together-take an art class, cooking lessons, etc
- Leave a sweet comment on the Facebook wall
- Teach your kids about marriage
- Stop what you’re doing, look them in the eye and listen to their answer
- Create art together
- Support each other’s goals
- Know when to talk and when to hush
- Consider counseling (even if there’s not conflict)
- Doodle his name
- Bring her flowers (even when she says they are too expensive)
- Wear something he loves
- Share furniture-sit in his lap
- Fight for your marriage
- Remember your spouse rocks-even when they don’t

Subscribe to:
Posts (Atom)